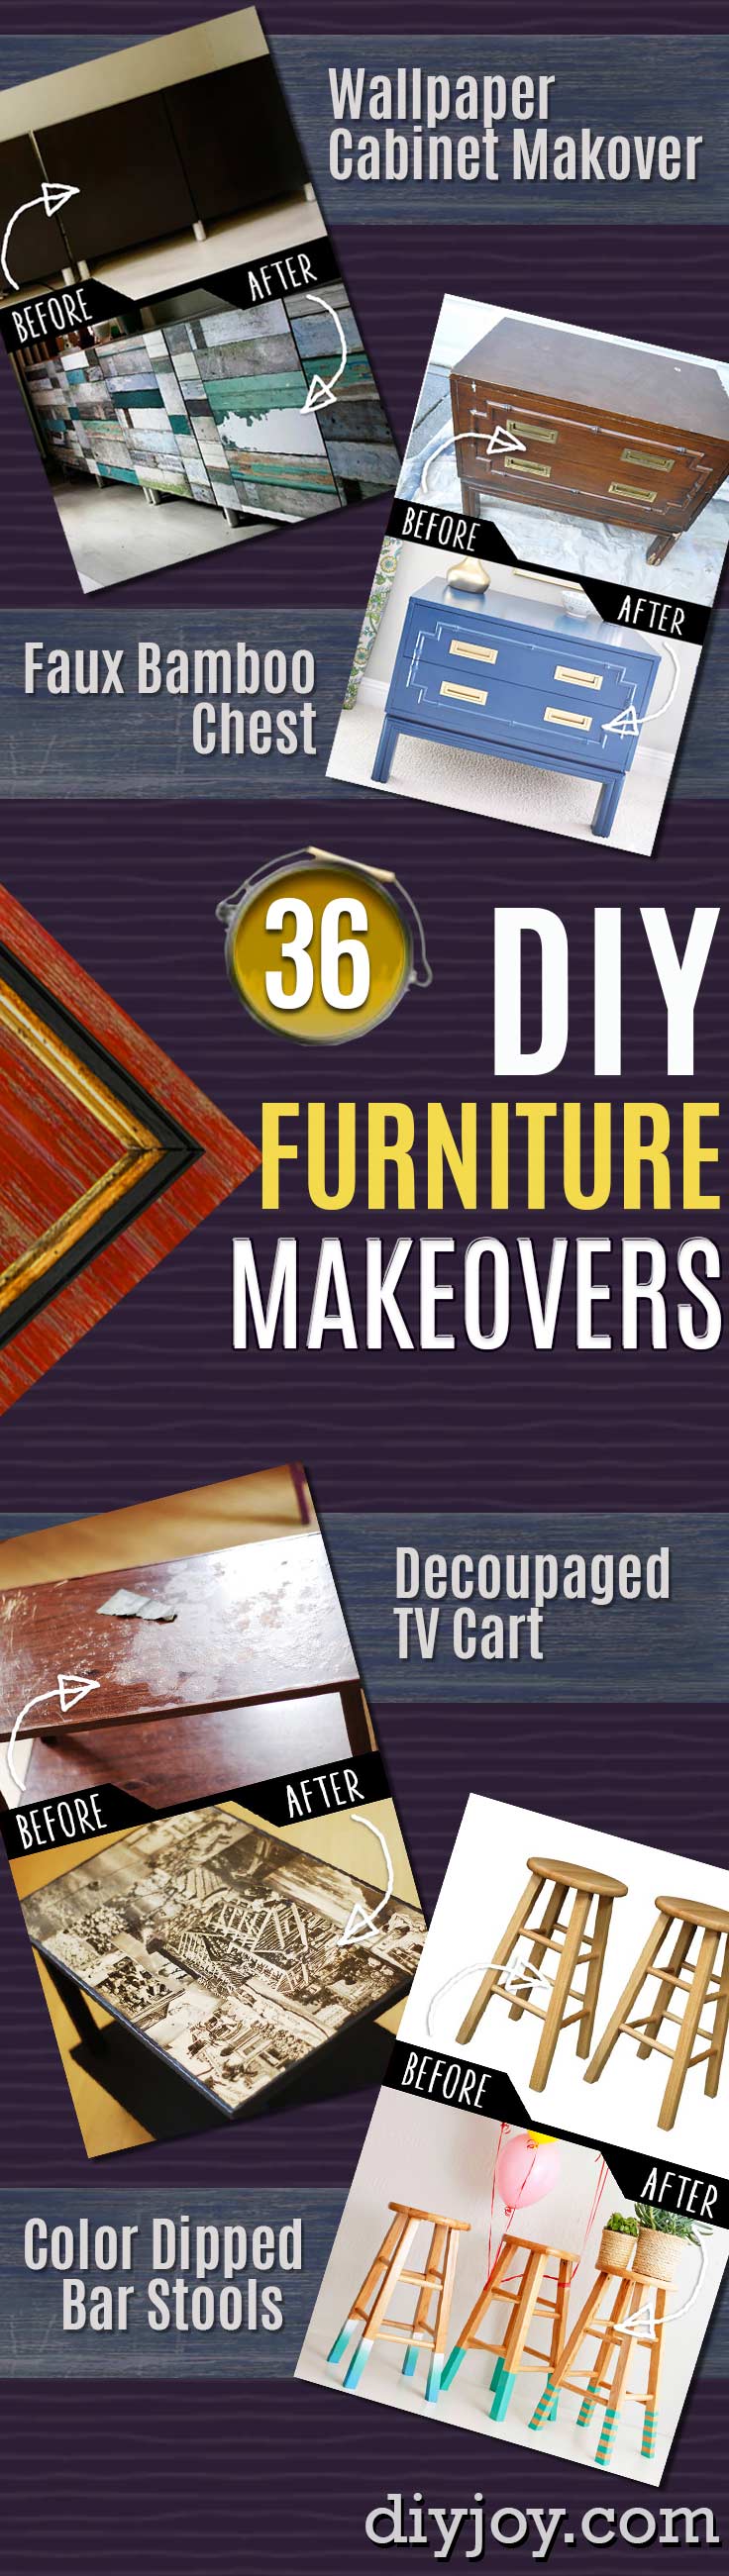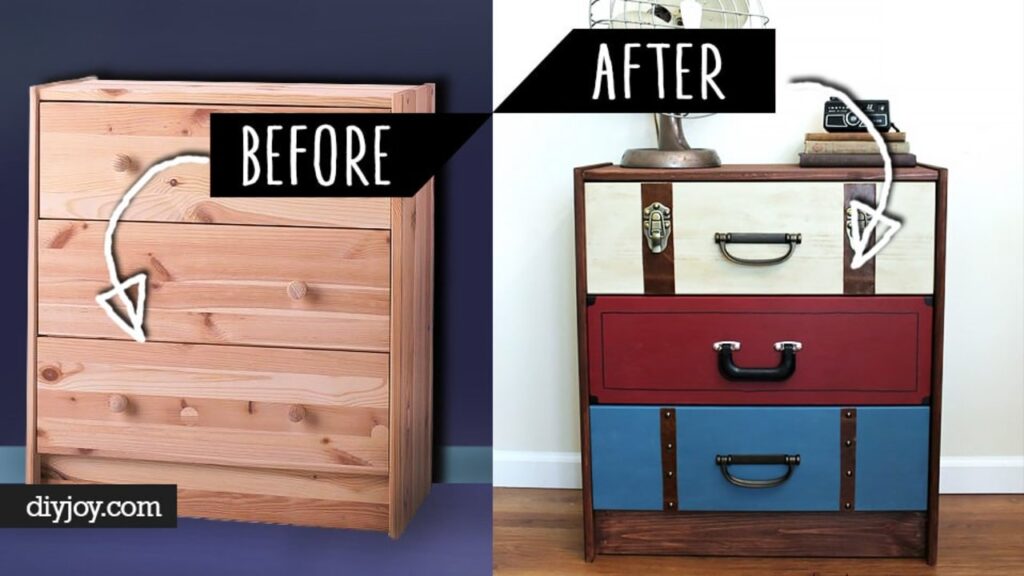
That tired dresser in the guest room doesn’t need replacing, it needs a weekend. These 18 DIY furniture makeovers start with pieces people already had: a scuffed coffee table, a plain IKEA shelf, a chest of drawers from a matching bedroom set. Nothing here turns a pallet into a table or a ladder into a shelf. Every project keeps the piece doing the same job and just makes it look a whole lot better. You’ll find bold paint colors, a geometric stain pattern, a ship painted across a dresser, fabric lined cubbies, faux leather fronts and a rattan chair rebuilt as Chinese Chippendale. Most need a sander, a brush and paint, so they’re great for beginners. Give one a try before you shop for new!
1. Low-Cost DIY Table Makeover
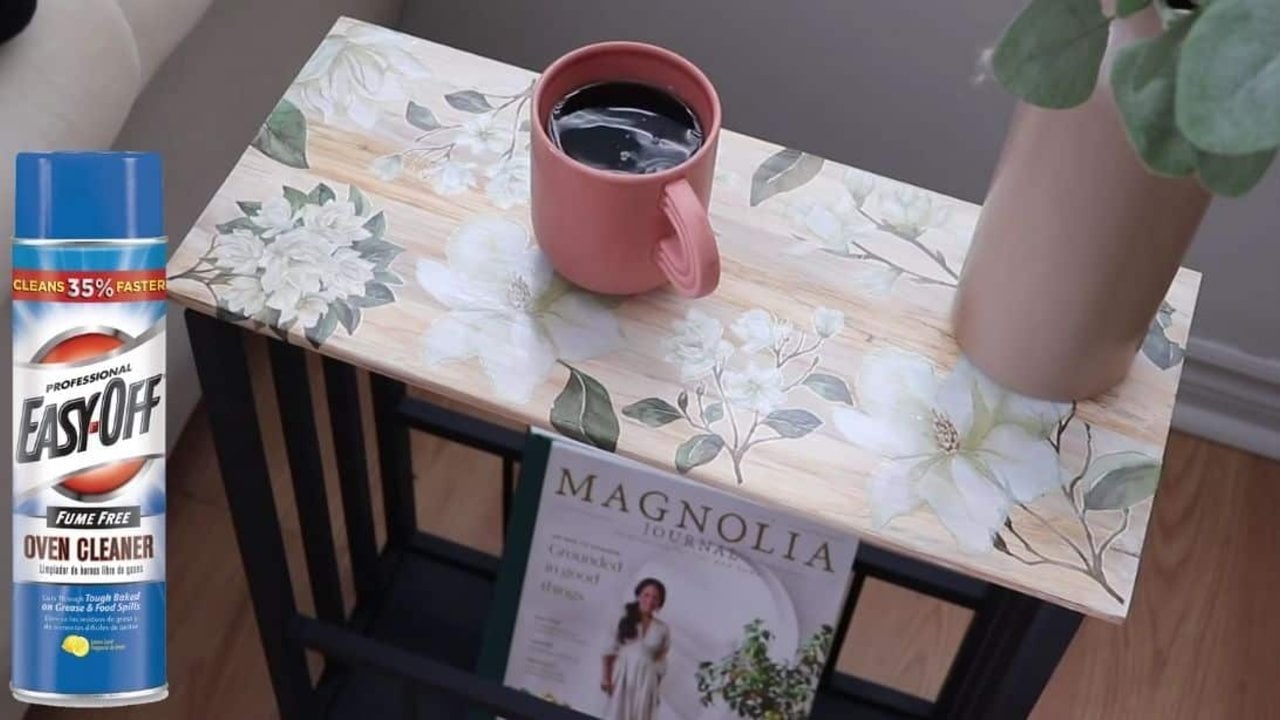
A worn, faded table gets a farmhouse style refresh in this low-cost DIY table makeover. Spray the top with oven cleaner, let it sit about 20 minutes, then scrub the old finish off; a sander or grinder handles any stubborn spots. Brush on white gel stain and wipe it right back with a damp cloth so only a soft whitewash stays in the grain. Paint the base navy, rub a floral transfer onto the top, then seal it with gloss varnish. It’s a pretty swap for buying new!
Get the full tutorial at DIY JOY.
2. DIY Decoupage Quilt Chair
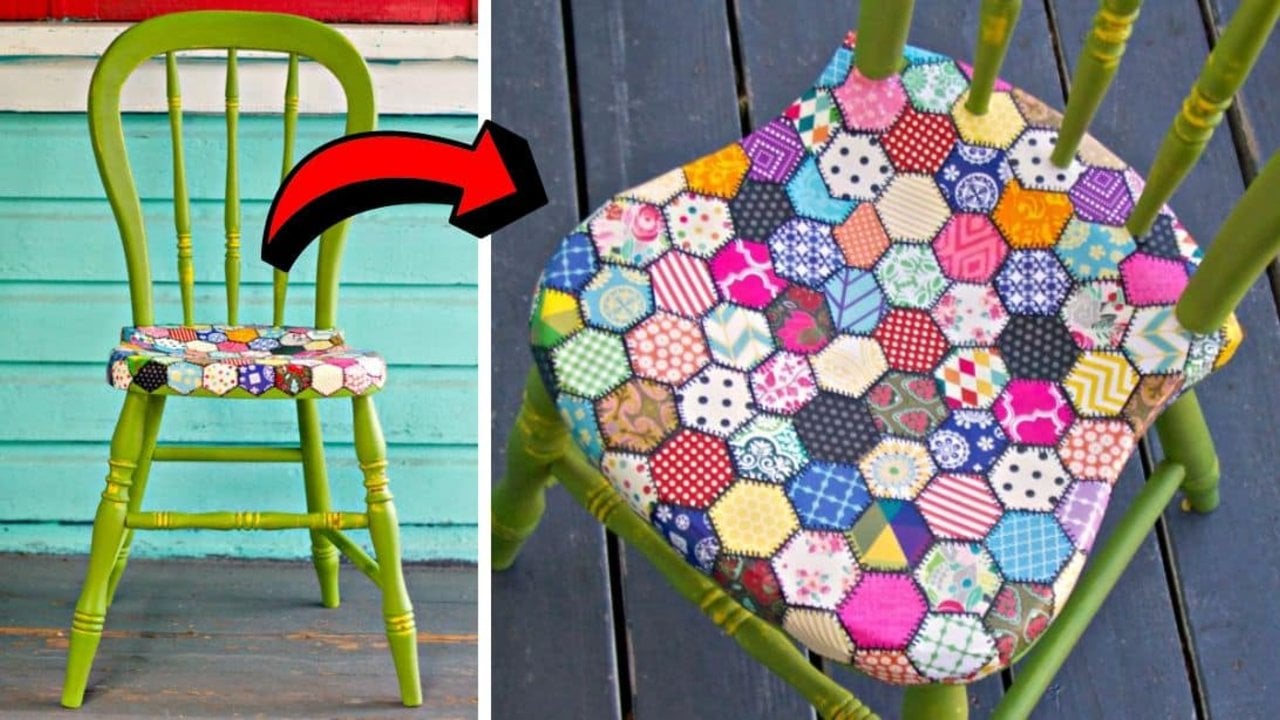
This DIY decoupage quilt chair turns a plain wooden chair into a cheerful patchwork piece with scrapbook paper. Prime the chair if it needs it, paint it yellow, then add a coat of green and rub some areas back with a damp rag so the yellow peeks through. Dark wax settles into the turned details for an aged look. Cut paper into hexagons, Mod Podge them onto the seat edge to edge, then draw little stitch lines around each one with a Sharpie. Seal it all with more Mod Podge.
Get the full tutorial at DIY JOY.
3. Tiered Shelf
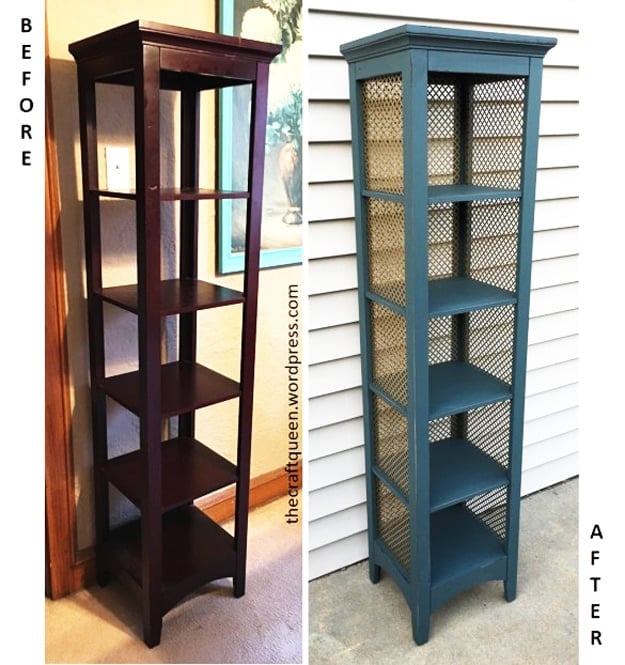
A tired wooden tiered shelf gets a fresh look with deep green paint and a little metal sparkle. Sand it lightly, roll on two coats of a dark pine green and let it dry a full day. Then sand the edges with fine paper so the corners look gently worn. The magic is stamped aluminum sheeting from the hardware store: cut it to fit the inside of the shelves with tin snips, wearing gloves, and stick it on with contact cement. Use that outdoors, because it’s really smelly!
Get the full tutorial at The Craft Queen.
4. How to Fake a Plank Look
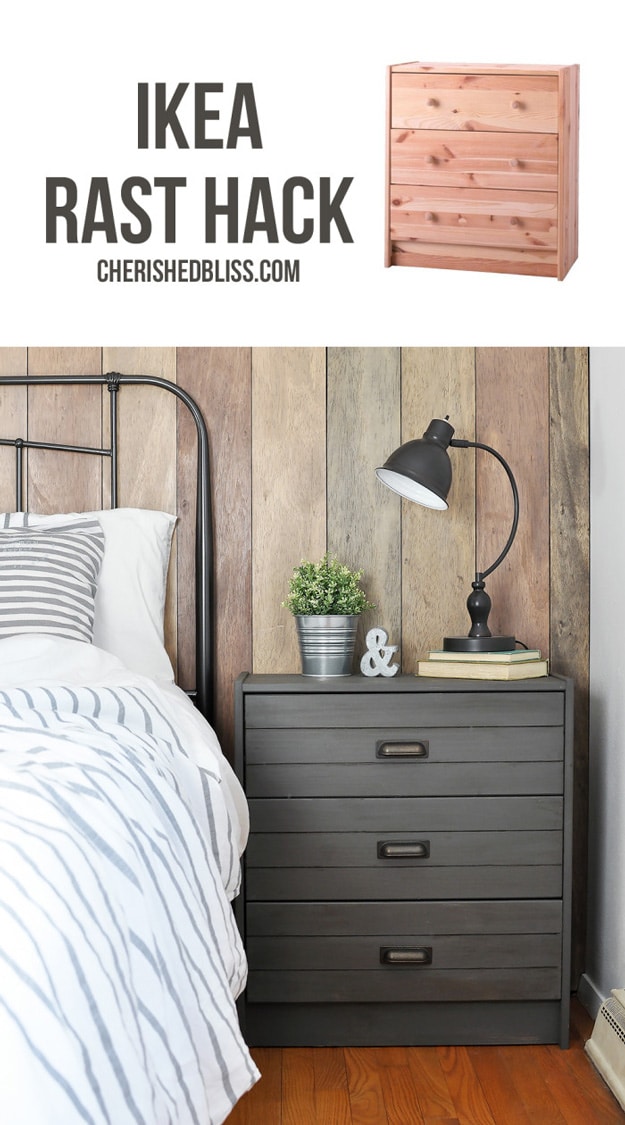
How to fake a plank look on a plain dresser: no planks required. Decide how many boards you want, then divide the drawer height to space the lines evenly. A circular saw with a rip cut guide, set to cut only about an eighth to a quarter inch deep, scores the lines right into the drawer fronts. Fill the old hardware holes, sand everything smooth and paint it a deep bronze gray. Dark wax brushed down into the grooves is what sells the illusion. New cup pulls finish the rustic industrial look.
Get the full tutorial at The Crafty Blog Stalker.
5. Decoupaged Coffee Table
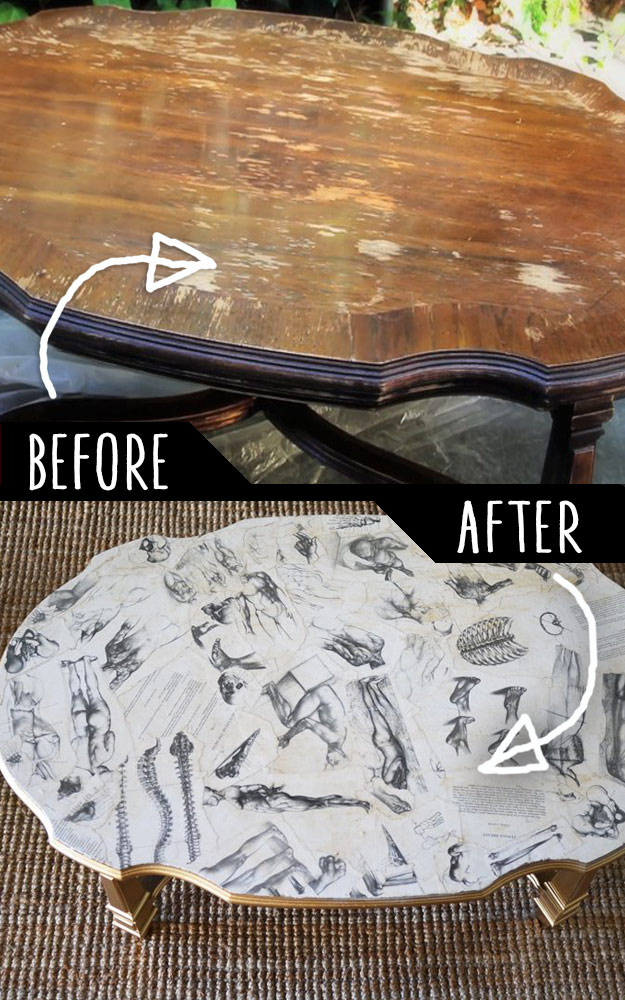
A decoupaged coffee table turns a roadside find into a real conversation piece. Sand the top lightly so the old finish goes matte, then prime the legs and spray them metallic gold. Soak torn art book pages or laser copies in a tub of coffee and water for a minute or two to give them a soft aged tint. Brush Mod Podge on the back of each page, lay it on the tabletop and smooth out any bubbles with your fingers. Once it’s dry, trim the edges with a razor blade and seal it with two coats of polyacrylic. Skip inkjet prints, because the ink bleeds!
Get the full tutorial at Mr. Kate.
6. Ikea Expedit Hack Shelves Makeover
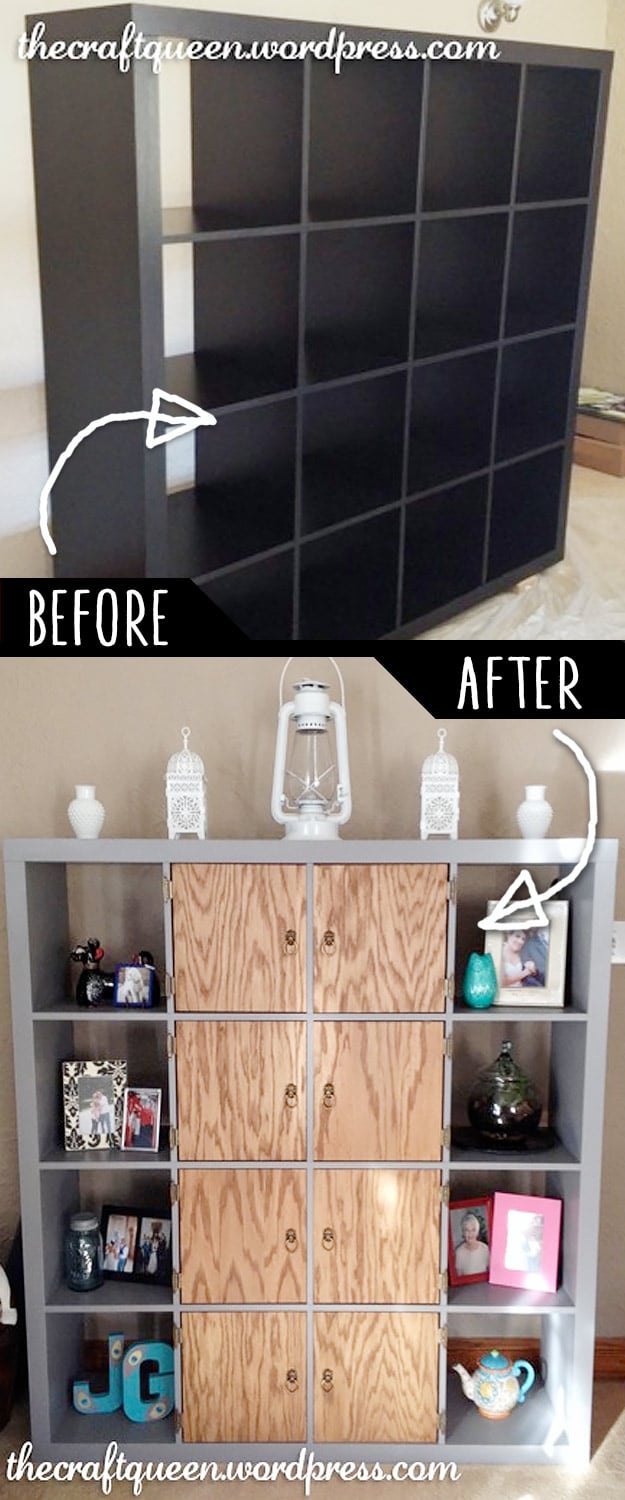
This IKEA Expedit hack shelves makeover adds wood doors to a plain black cube unit. Prime the whole thing twice with a bonding primer, sanding lightly between coats, and let it dry a full day. Two coats of a warm pewter gray go on with a foam roller. Cut quarter inch sanded plywood into 13 inch squares, condition and stain them, then hang them on two hinges each with a pull. Fill the open cubes with frames and decor, and the closed ones hide the clutter.
Get the full tutorial at The Craft Queen.
7. Unmatching Dresser Re-do
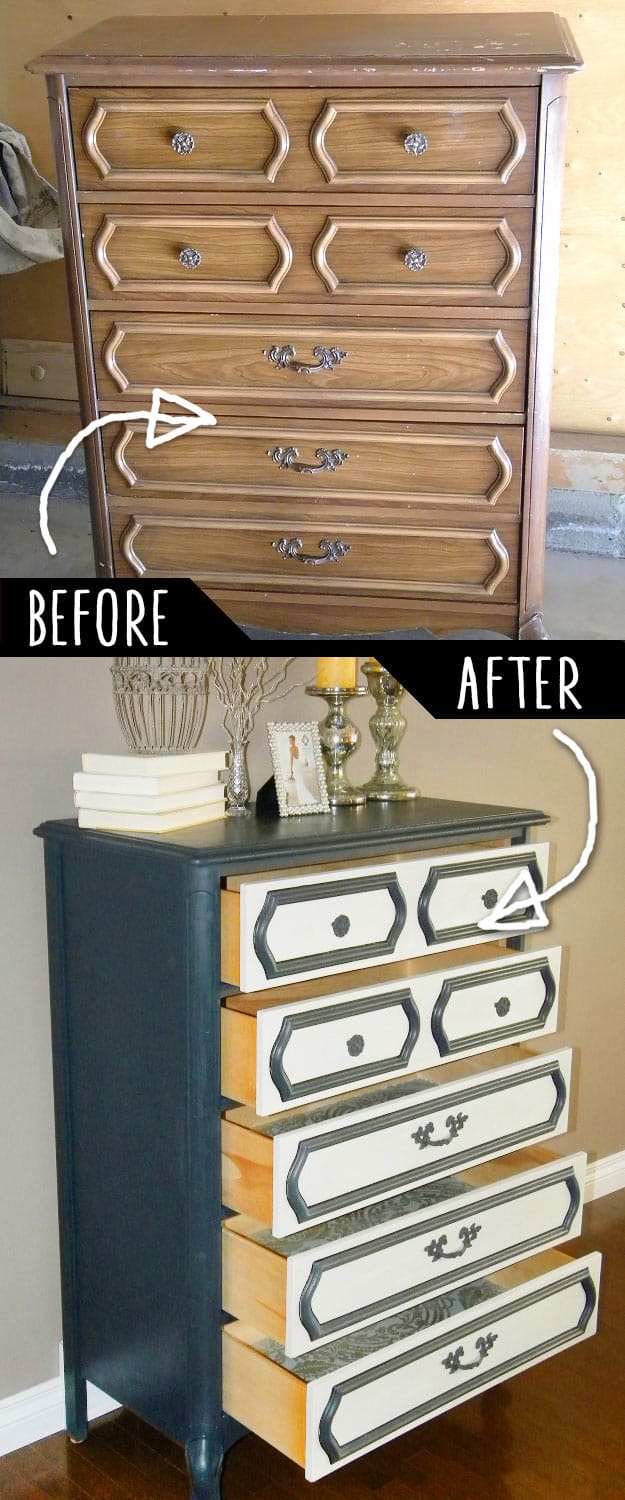
An unmatching dresser re-do lets one piece from a bedroom set stand on its own. Fill any damage on top, sand it smooth, then build up two coats of an off white chalk paint before covering the frame in deep graphite gray. The drawers get a lighter gray mix, two coats with no distressing. To outline the raised trim, an oil based fine tip paint pen beats a regular one, because it leaks just enough paint into the tight edges. Line every drawer with pretty wallpaper.
Get the full tutorial at Scrap Me Baby.
8. Geometric Mid Century Dresser
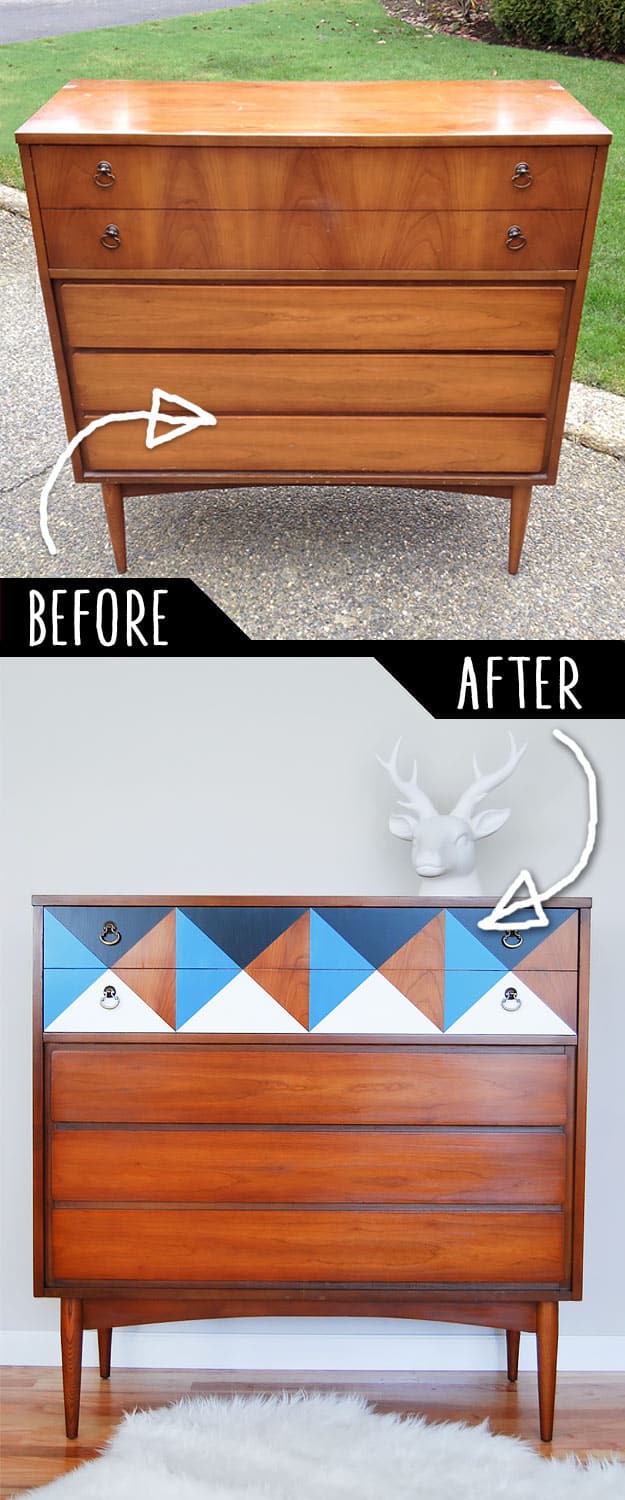
A geometric mid century dresser shows how much a little tape can do. The original wood stays on most of the piece, so its warm grain still gets to shine. The top drawers are where the fun happens: measure, tape off a row of triangles, and fill them with blue, white and a contrasting wood stain for a crisp diamond pattern. Clean lines come down to pressing the tape edges well before you paint. The original ring pulls stay on for a mix of vintage and modern.
Get the full tutorial at The Weathered Door.
9. Plain Rattan Chair to Chinese Chippendale Chair
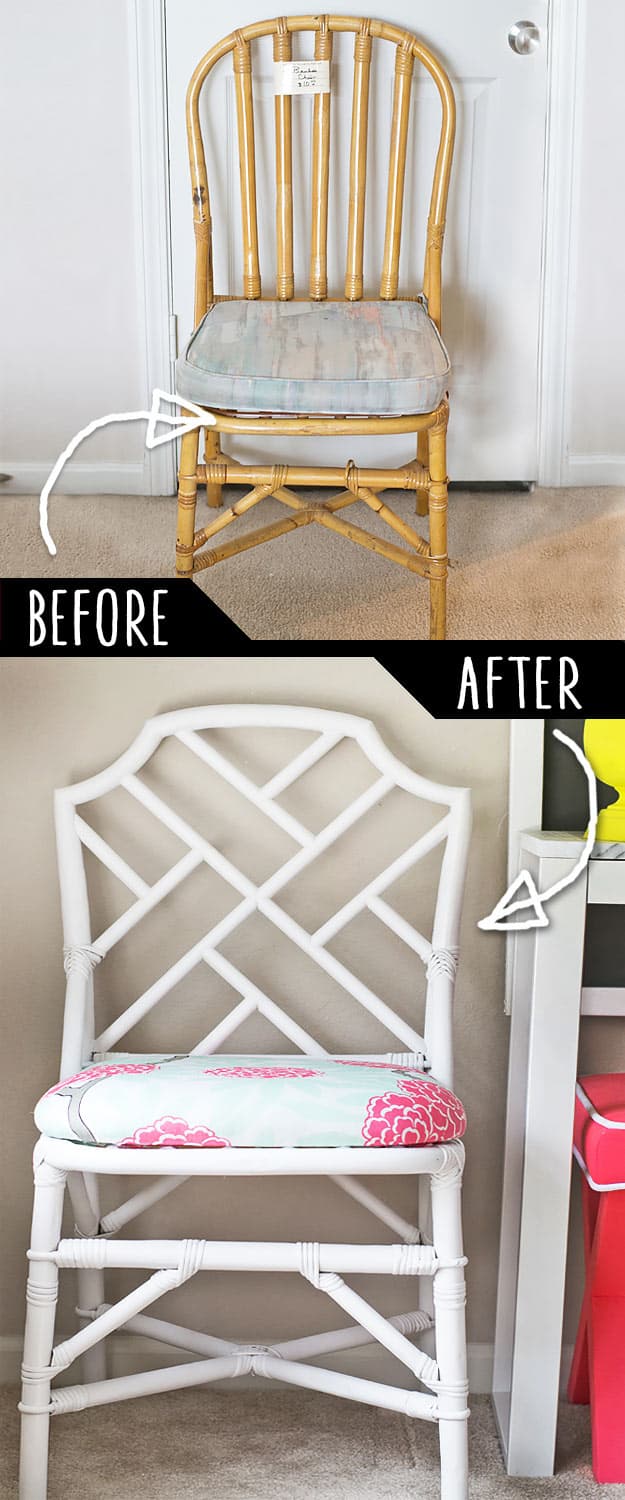
A plain rattan chair to Chinese Chippendale chair makeover started with a $10 thrift store find. The corners of the back were cut, flipped and glued, then thin dowels from the hardware store were measured, cut and fitted into the classic lattice pattern, with a Dremel sanding the ends flush. A new plywood seat attaches underneath with thin strips and screws. Fill the seams, sand, then prime and paint in satin white. Upholster a fresh foam cushion in a pretty floral, and it looks expensive!
Get the full tutorial at Dorsey Designs.
10. Ship Silhouette Chest of Drawers Makeover
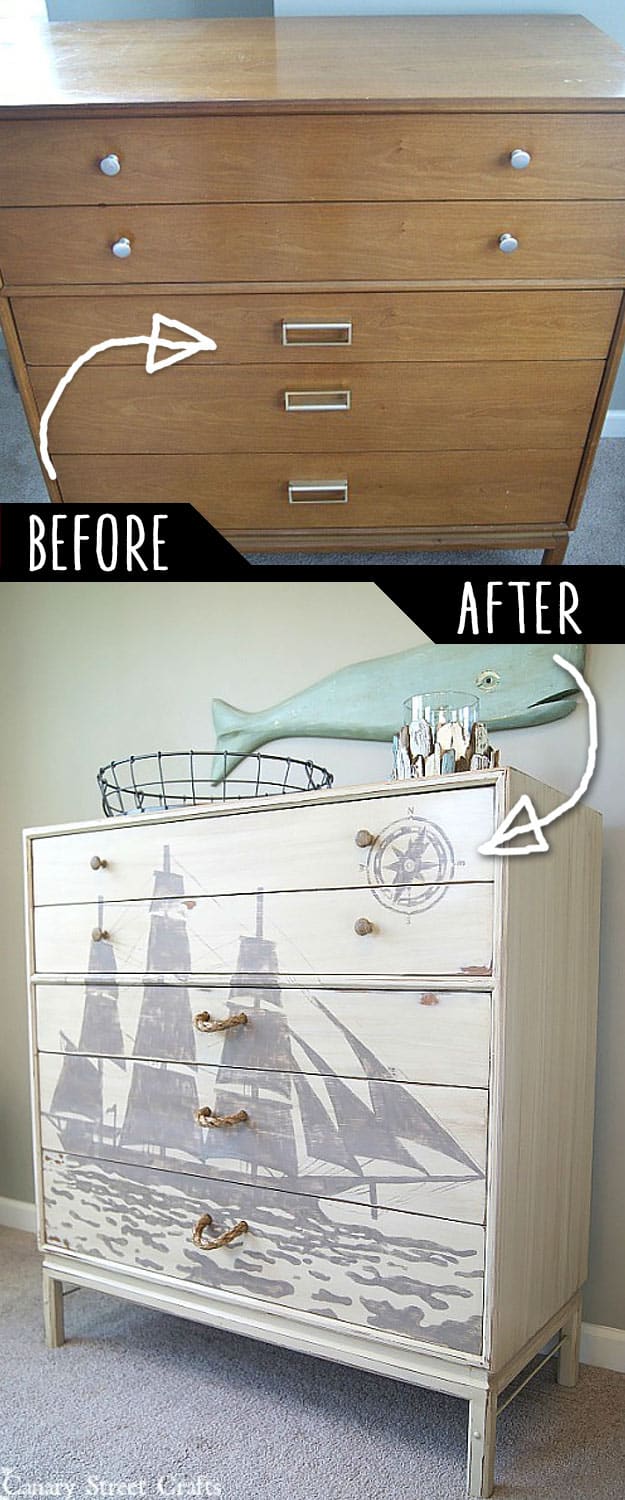
A ship silhouette chest of drawers makeover turns a thrift store chest into nautical bedroom decor. Clean it well and paint it a soft ochre chalk paint, then sketch a tall ship across the front and fill it in with a deep brown. If it feels too bright, water down the brown and brush it over everything in sections, wiping it back with a rag so streaks look like wood grain. Swap the bottom pulls for thick rope from the hardware store, knotted through drilled holes.
Get the full tutorial at Canary Street Crafts.
11. Color and Wallpaper Night Desk Revamp
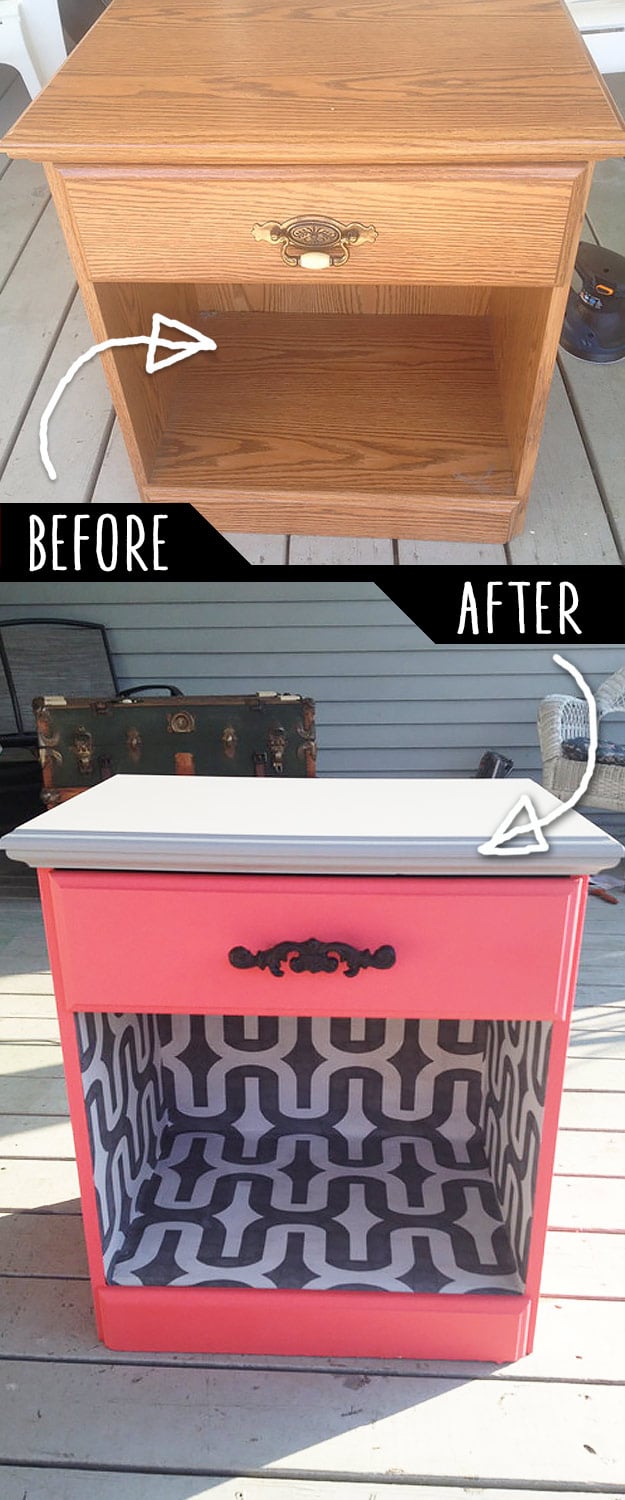
This color and wallpaper night desk revamp began as an $8 garage sale nightstand. Sand the big surfaces lightly, wipe them clean, and paint the body coral in about three coats. Wallpaper costs a lot, so fabric and Mod Podge stand in for it: cut panels for the back, bottom and sides of the open cubby, brush on Mod Podge, smooth the fabric with an old ID card, then add a top coat to seal it. A gray top and fresh hardware finish it off.
Get the full tutorial at B Repurposed.
12. Revamped Geometric Side Table
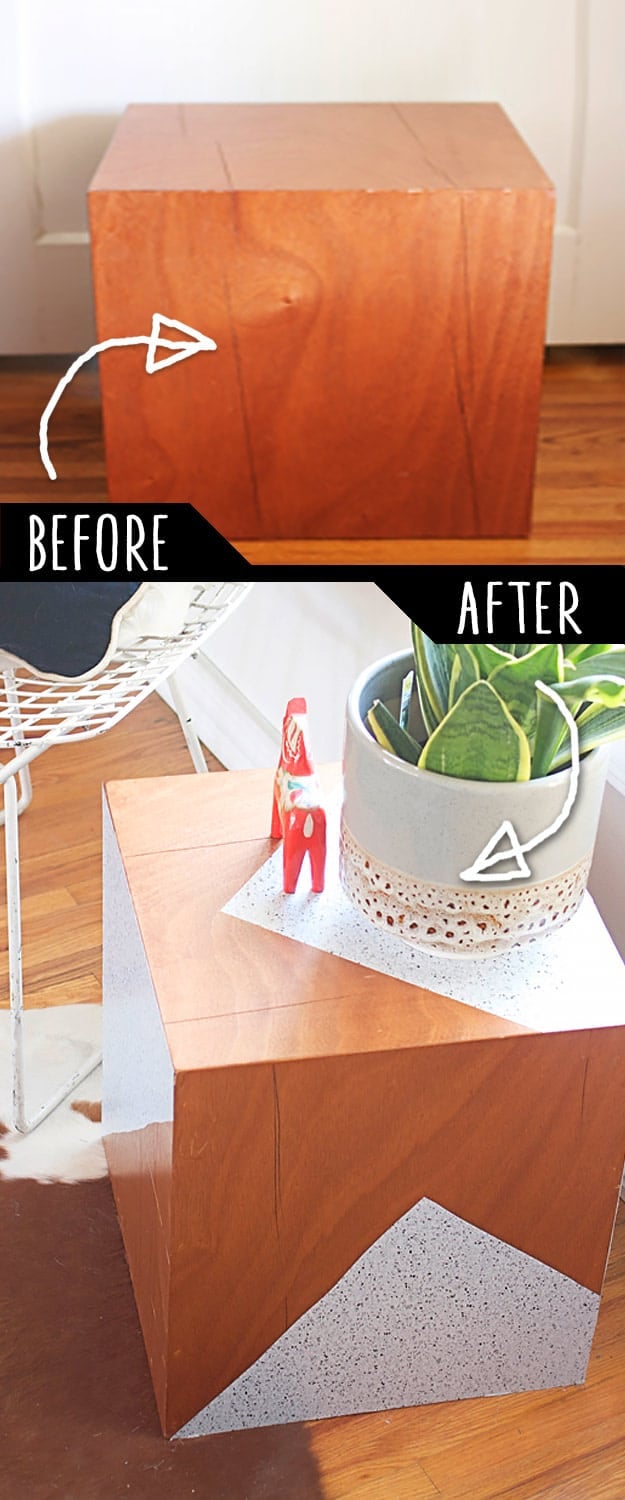
A revamped geometric side table needs nothing more than contact paper and a pair of scissors. Start with a plain thrifted cube table and give every surface a good clean. Measure each side, then cut your contact paper into crisp triangles and shapes, cutting all the pieces for one side in one go so the pattern lines up. Smooth them on one side at a time, pressing out any bubbles as you work. A metallic or glitter paper looks especially fun on the corners. The best part? It peels right off when you’re ready for a new look!
Get the full tutorial at Hello Lidy.
13. Cabinet Transformation
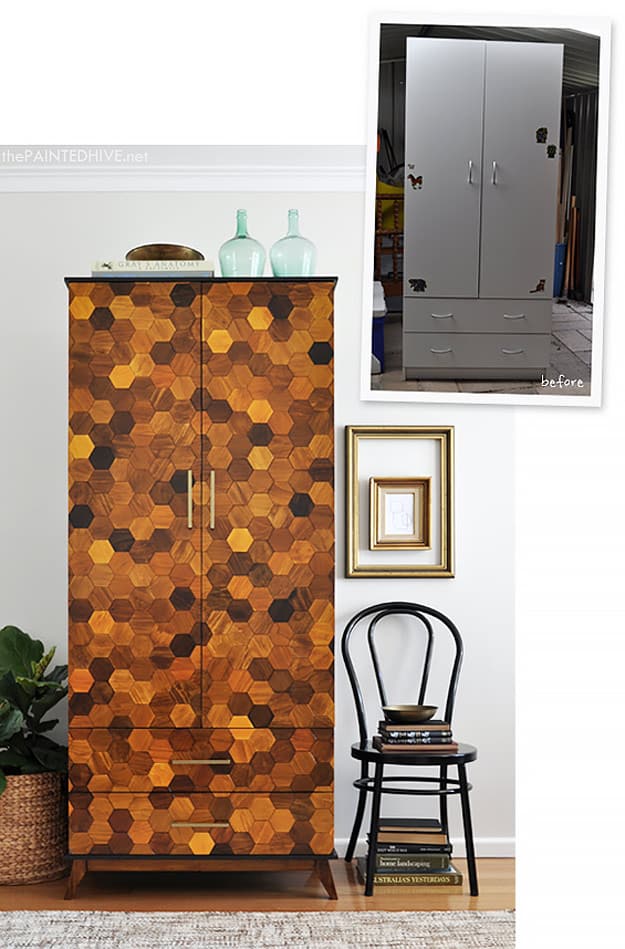
This cabinet transformation takes a $50 melamine wardrobe somewhere totally unexpected. Clean it well, remove the doors, drawers and hardware, and measure the gaps between doors before you start. Hexagons cut from timber are stained in a mix of shades, then fitted across the doors and drawer fronts like a honeycomb, so the plain white box turns warm and mid century. Mark the doors left and right as you go. Tapered legs and slim brass pulls finish the new look.
Get the full tutorial at The Painted Hive.
14. Silver Dipped Magenta Table
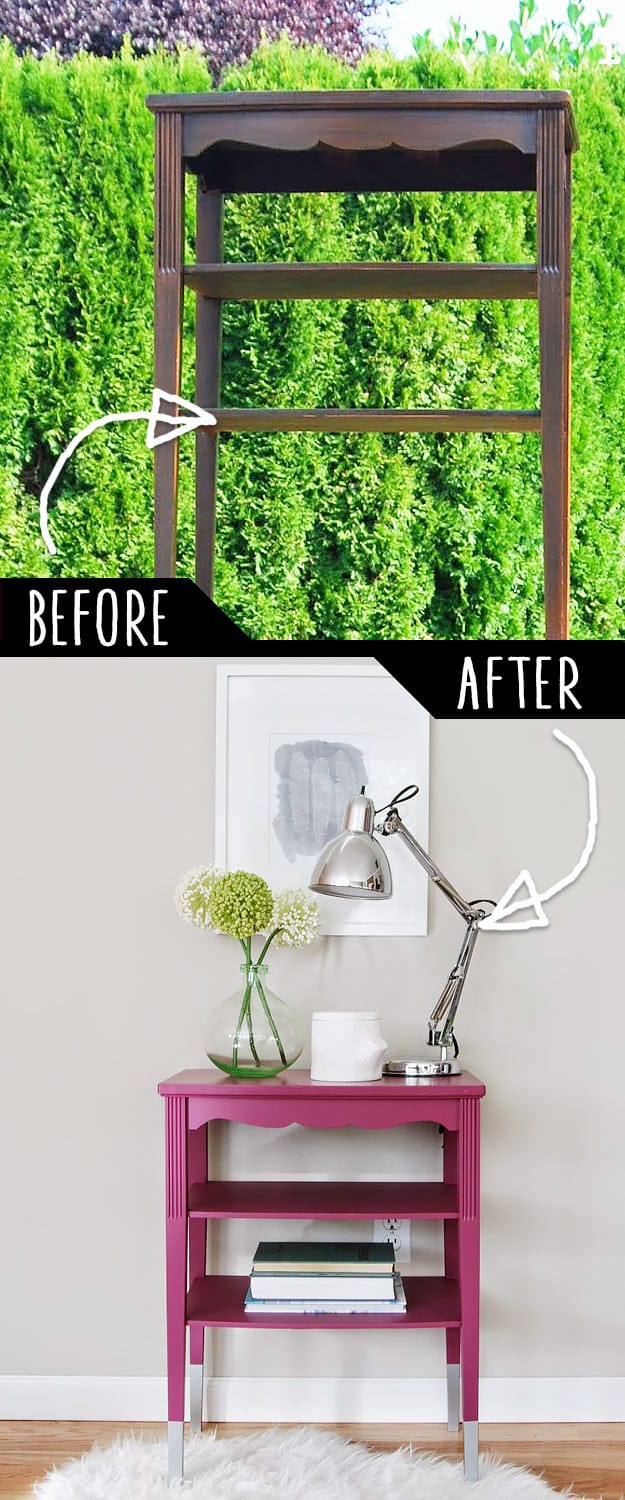
A silver dipped magenta table proves a nightstand can be the boldest thing in the room. Three coats of a rich plum magenta cover the whole mid century piece. Then tape off the bottom of the legs and add a coat of medium gray first, so the silver doesn’t need endless coats to cover the dark color. Three thin layers of metallic silver go on with a foam brush. Protect the top with a flat topcoat where it’ll get the most wear, and clear wax everywhere else.
Get the full tutorial at The Weathered Door.
15. Garden Table Upgrade
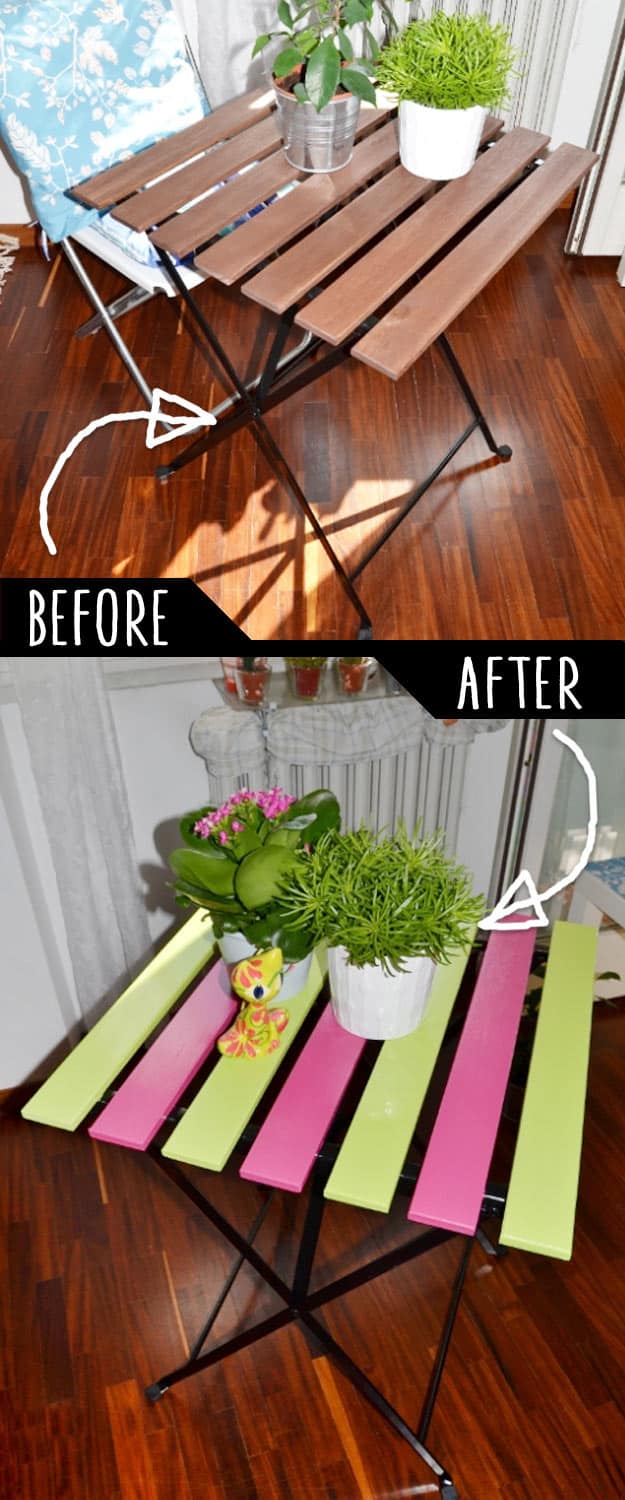
A garden table upgrade takes a folding slatted bistro table from patio to breakfast nook. The base and frame stay as they are, and the fun is all in the slats. Paint them in alternating stripes of hot pink and lime green, keeping each slat a single solid color so the stripes stay crisp. Use outdoor paint if it’s heading back outside. It works on folding chairs too, so you can make a matching set in any two colors you love.
Get the full tutorial at BlackFaceSheep.
16. DIY Faux Marble Table Top
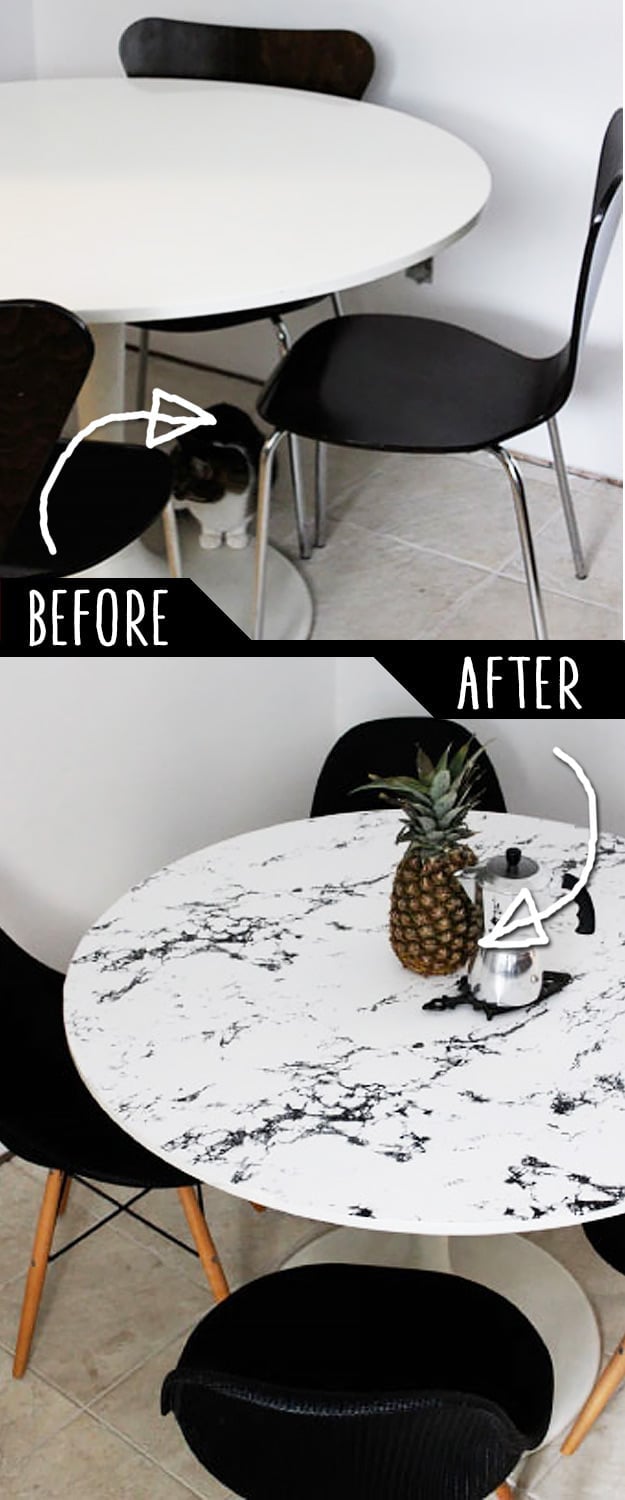
A DIY faux marble table top is the quickest fix for a round table covered in stains and scuffs. The secret is marble look contact paper. A pedestal table is heavy to flip, so lay the paper design side down on the top, trace the circle with a pencil, then cut it out and smooth it on from one edge. Pick a thick, bubble resistant paper, and pop any stubborn bubbles with a pin. It’s a renter friendly update, and a glass top laid over it will help it last even longer.
Get the full tutorial at Poppytalk.
17. Roping Style Discard Bench Makeover
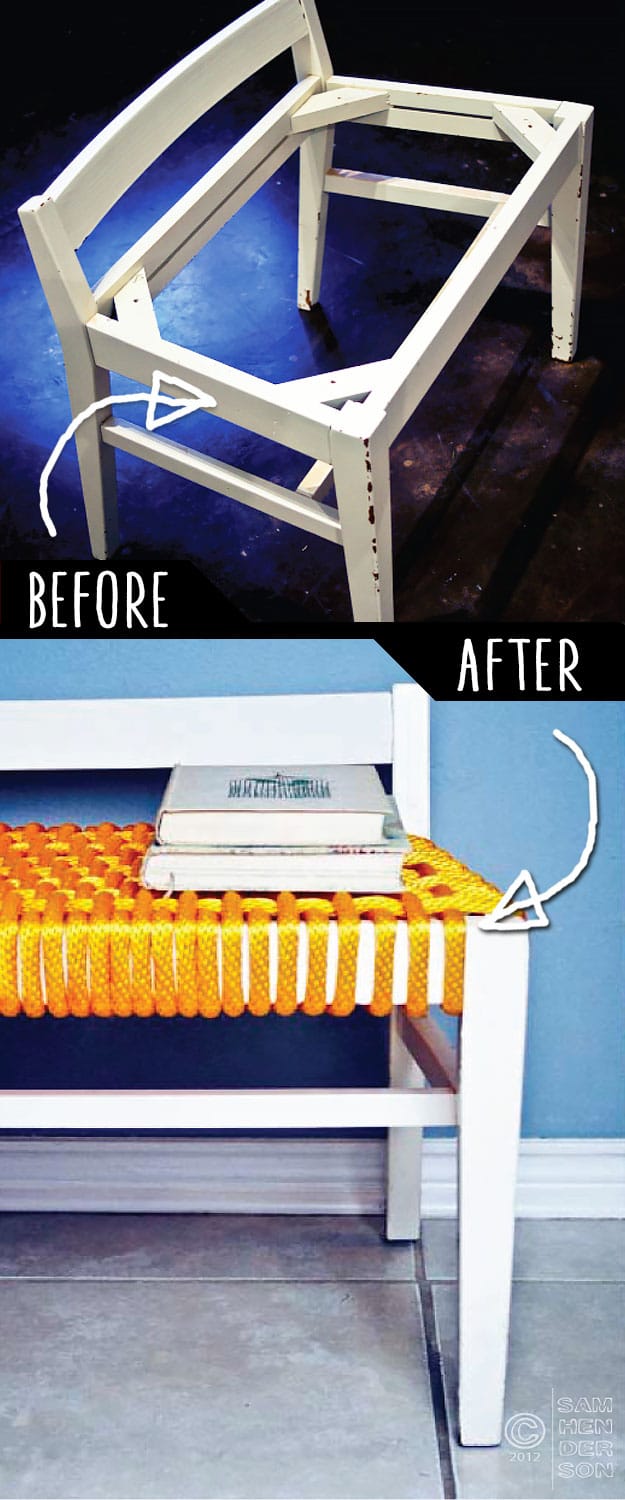
A roping style discard bench makeover saves a bench frame that was headed to the curb. Pull out the old staples and nails and clean up the frame, then weave a brand new seat from bright towing rope from the hardware aisle. Work back to front first: staple one rope at each end and one in the center, then keep filling in halfway between until they’re evenly spaced. Next, weave the side to side ropes over and under, pulling each one tight. Tap the staples in with a hammer and seal the cut ends with a lighter.
Get the full tutorial at Today's Nest.
18. Leather Upholstered Mini Drawer Set Makeover
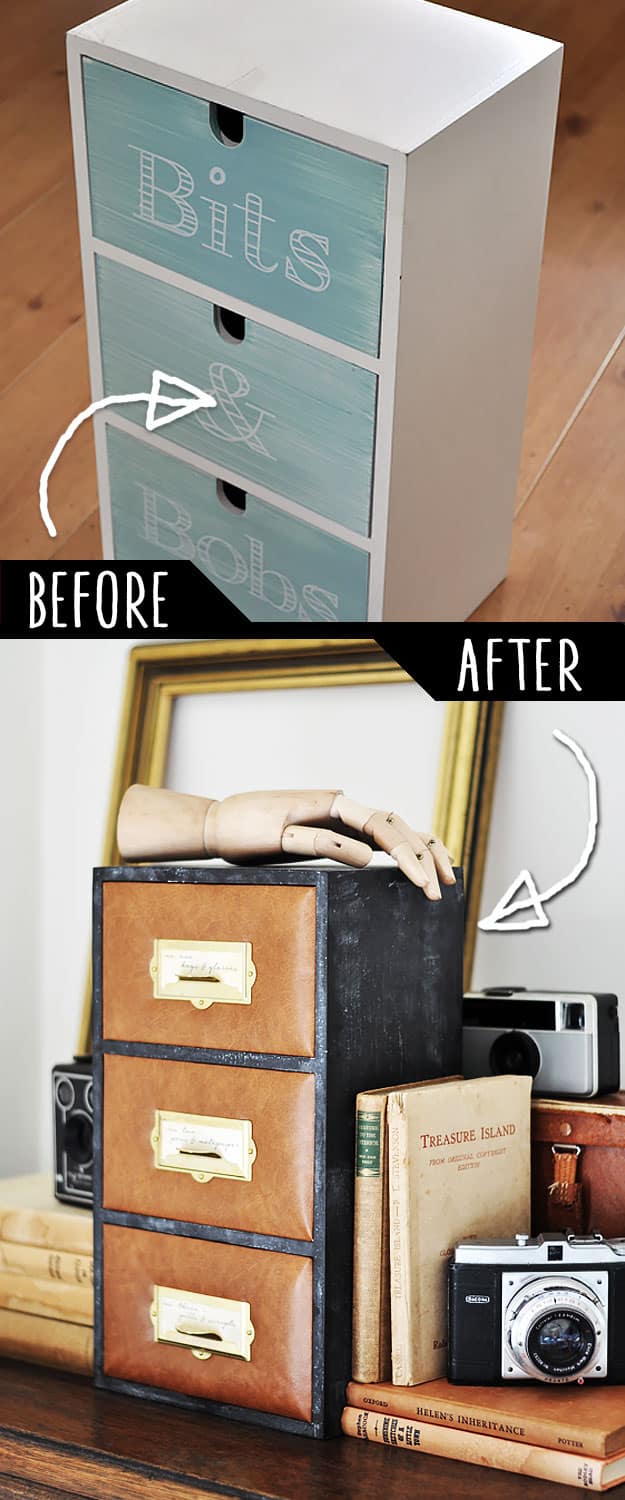
A leather upholstered mini drawer set makeover turns a $12 store bought set into something that looks like an antique library piece. The finger pulls were the tricky part, so instead of filling them, each drawer front gets wrapped in thin faux leather contact paper, which fits where real leather is too thick to let the drawers close. Paint the frame a dark charcoal. Brass label holders on each drawer finish the vintage card catalog look, and they’re handy for labeling what’s inside.
Get the full tutorial at The Painted Hive.